

반응형
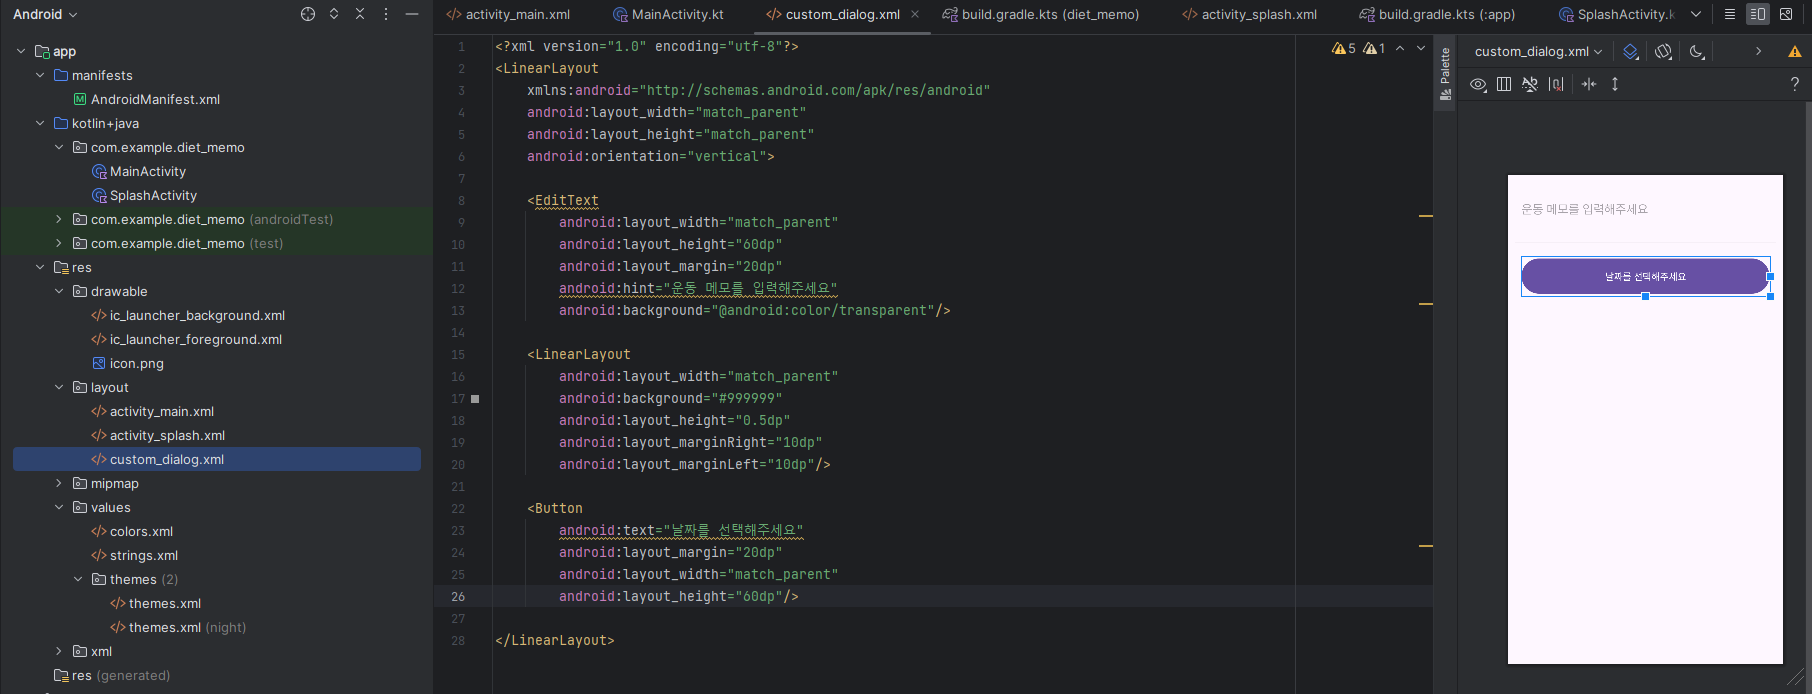
1. layout에 custom_dialog 생성
2. 아래와 같이 대략적인 다이얼로그가 실행되면 보일 화면 툴을 생성한다.
<?xml version="1.0" encoding="utf-8"?>
<LinearLayout
    xmlns:android="http://schemas.android.com/apk/res/android"
    android:layout_width="match_parent"
    android:layout_height="match_parent"
    android:orientation="vertical">

    <EditText
        android:layout_width="match_parent"
        android:layout_height="60dp"
        android:layout_margin="20dp"
        android:hint="운동 메모를 입력해주세요"
        android:background="@android:color/transparent"/>

    <LinearLayout
        android:layout_width="match_parent"
        android:background="#999999"
        android:layout_height="0.5dp"
        android:layout_marginRight="10dp"
        android:layout_marginLeft="10dp"/>

    <Button
        android:text="날짜를 선택해주세요"
        android:layout_margin="20dp"
        android:layout_width="match_parent"
        android:layout_height="60dp"/>

</LinearLayout>
//기존에 메인액티비티 레이아웃에 만들어놨던 버튼 동작 코드

        val writeButton = findViewById<ImageView>(R.id.writeBtn)
        writeButton.setOnClickListener {
val mDialogView = LayoutInflater.from(this).inflate(R.layout.custom_dialog, null)
val mBuilder = AlertDialog.Builder(this)
.setView(mDialogView)
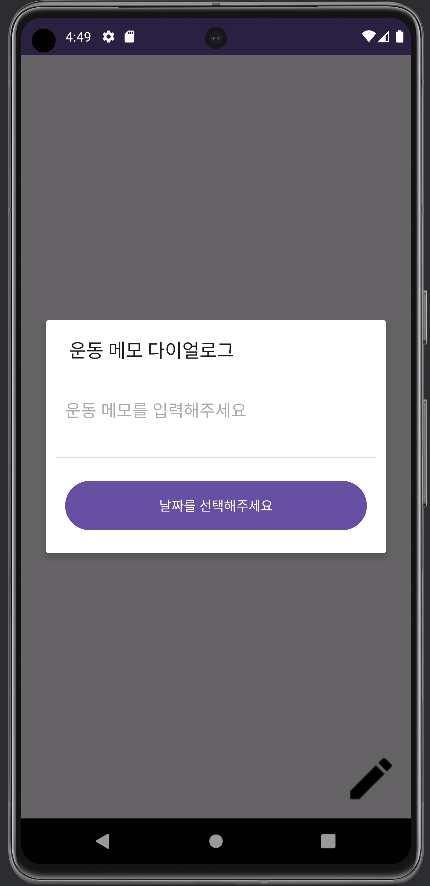
.setTitle("운동 메모 다이얼로그")
mBuilder.show()
상단 코드는 메인액티비티에 만들어놓은 버튼을 누르면 동작하게 하는 코드
그 아래에 다이얼로그 코드를 mainactivity에 해당 코드를 기입한다.


어플 실행 후 하단에 미리 설정해놨던 버튼을 클릭하면해당 다이얼로그가 표시된다.
반응형
'kotlin↗ > 안드로이드 스튜디오 메이킹' 카테고리의 다른 글
| [KOTLIN] 컬러 변경 및 컬러 색상 추가하기 (0) | 2024.02.07 |
|---|---|
| [KOTLIN] Dialog에 날짜 선택 만드는 코드 (0) | 2024.02.07 |
| [KOTLIN] Firebase 어플 실행 시 Splash 화면에서 비회원 로그인 받아주기 (0) | 2024.02.07 |
| [KOTLIN] FIREBASE 파이어베이스 익명 로그인 (1) | 2024.02.06 |
| KOTLIN]해당 이미지(버튼)을 누르면 원하는 화면으로 넘어가기 (0) | 2024.02.01 |